- November 9, 2024
- by ByASN
- Blogging
- 0 Comments
Hello World, today we are discussing how we can migrate our websites from one hosting panel to another. In this article, we share the easiest way to migrate a website from one to another hosting panel. This is a very simple and easy way you won’t need any database or backup from your hosting panel.
Website Migration in Just a Few Clicks
We have an old Hostinger hosting account and we don’t want to renew it again for next year due to high renewal costs. We purchased the new hosting from Hostinger and it’s time to migrate the websites from one hosting plan to another hosting plan.
We deeply researched how we can migrate our full website with all the data like the website’s design, blog posts, permalinks, products, database, etc in just a single click. We found some ways like 1st exporting website files from the file manager and then exporting databases etc. But it’s a very time-lengthy and time-consuming method and we don’t have time for this. So, we found the correct, easy, and too much simple method for this problem. You just need a single plugin for this process.
Export Your Website’s Backup File – Step #1
Download and install the All in One WP Migration V6.7 Plugin on your WordPress website.
- Go to Plugins from the WordPress sidebar and click on “Add new plugin.” Then click on the Upload plugin. Now upload the given “All in One WP Migration V6.7” and activate it.
- Now click on “All-in-One-WP Migration” from the WordPress sidebar.
- Now click on the “Export To” button and click on the “FILE” button.
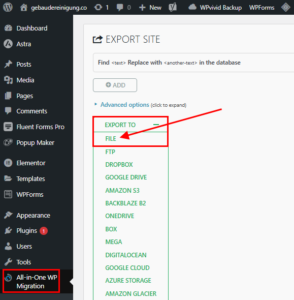
- Now your website backup file is started for preparation and it’s available for download. By clicking on download (Green Button), you can download the backup file of your website.

Import Your Website’s Backup File – Step #2
The importing process is simple and easy just like the exporting process.
- 1st click on “All-in-One-WP Migration” from the WordPress sidebar. Now click on the “Import” button and click on the “FILE” button.
- Now upload your downloaded backup file. Your importing process has started. Wait for the importing process to finish, and your website will be live with the file manager and database. There is no need to do anything.
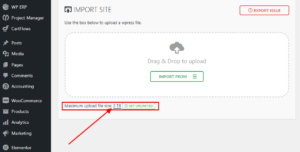
All-in-One WP Migration Memory Limit Problem – Upload up to 2TB
Please do not install the latest version of this plugin from WordPress. Only install the V6.7 of this plugin for getting up to 2TB uploads. If your exported file is up to 2GB or higher then the plugin (All-in-One-WP Migration) will ask you pro version. We need to change its code to get up to 2TB of memory.
The zip file password is “ByASN.com”
Follow these steps:
- Click on “Plugins” from the WordPress sidebar and then click on “Plugin File Editor”.

- Now select the “All-in-One-WP Migration” and click on the “constant.php” file of this plugin. Now, go to line number 284 of this file.
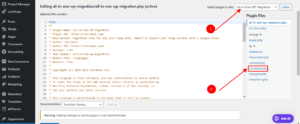
- Now go to line number 284 from the code file.

- Here you can see “define( ‘AI1WM_MAX_FILE_SIZE’, 2 << 28 );”. In this line you just need to change “28” to”40″.
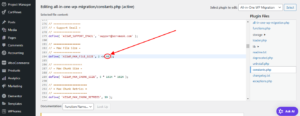
- That’s solved. Now, scroll down and click on the “Update File” button. Now, you can upload up to 2TB file in All-in-One-WP Migration Plugin.
- You can check the memory limit during file import.
